Now that Rktcr's level editor is percolating out to those that purchased the game on Desura, it seems like a good idea to go about documenting how to use it. The editor does have a few rough edges (save often! there are crashes), but it is the thing I used to create all the levels in the game.

In this tutorial, I will show you how to use Rktcr's editor to create a simple challenge level that will appear in the game.
Video
There is also a video version of the tutorial, for those of you who are into that kind of thing:
If you, like me, enjoy textural tutorials, read on...
Preliminaries
Rktcr stores data in two directories: the "game directory" (the directory where executable is located) and the "user data directory" (a system-specific directory). The idea is that when upgrading/whatever you should be able to delete your game directory and not lose, e.g., saved teams.
The game directory is located wherever you (or desura) put it. The user data directory is located in your home directory (that is, at "~/.rktcr") on Linux and OSX; and in your user profile directory (that is, at "%UserProfile%\rktcr", which usually expands to something like "Documents\rktcr") on Windows.
This tutorial is going to be written from a Linux/OSX point of view, which means I will use forward slash as my path separator and ".rktcr" to refer to the user data directory.
Level File Handling
Before I go into how to actually create levels, it's important to realize that levels in Rktcr exist in two forms: editable and playable. Editable levels are what you load and edit in the editor (not so complicated, eh?), and are in a text format aimed at extensiblity and versioning. Playable levels are what you actually play in the game, and are in a binary format optimized for loading speed.
Editable user levels live in the ".rktcr/e_levels" or "rktcr/e_userlevels" directories, while playable user levels live in the ".rktcr/levels" or "rktcr/userlevels" directories. Playable levels are generated by Rktcr from their editable counterparts when saved in the editor (or any time the game is run and the playable levels have older timestamps).
Starting the Editor
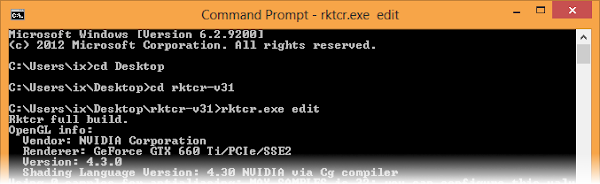
You start the editor by passing the command line parameter "edit" to Rktcr. This is going to require that you use a command-line shell (or write a small script). Using a command line interface is probably something you should already know how to do, if only because it is the easiest way to actually use your computer. (Yep, that says a lot about me right there, doesn't it.)
Windows
Under Windows, tap winkey to bring up the start menu, type cmd.exe, and press enter. You should now have a nice cmd.exe shell open.
(For earlier versions of windows, winkey-r might be more your speed.)
Use the `cd` command to change the current working directory to Rktcr's game directory.
Now type `rktcr.exe edit` to start Rktcr in editing mode.
OSX
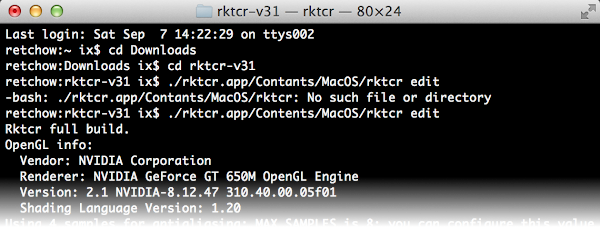
With OSX, launching a terminal is as simple as pressing command-space to open spotlight, typing terminal (or a short prefix thereof) and slapping enter.
Once you've got a terminal open, use `cd` to change to the rktcr directory, and then run Rktcr from within the .app bundle as `/rktcr.app/Contents/MacOS/rktcr edit`
Linux
You use Linux and you don't know this stuff? That's probably a really good sign as far as the maturity of your distro as a desktop OS. Unfortunately, because there are so many different Linux distributions and configurations, you're on your own as to actually how to find a terminal emulator. (FWIW, I get one by pressing meta-enter, but that's probably just me.)
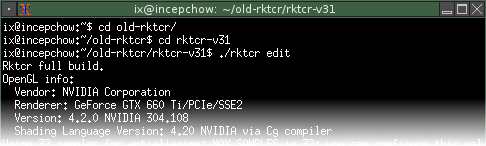
Once you find it, though, it's a simple job of `cd`-ing to the rktcr directory and invoking `./rktcr edit`.
Your First Level
When you launch the Rktcr editor you'll arrive at a blank screen:

This is your level-in-progress. You can move the view by middle-click dragging, and zoom using the mouse wheel. (On OSX, this is command-left-click dragging and two-finger up/down motion, respectively.) Of course, there's nothing in the level to see, so these motions don't do much yet.
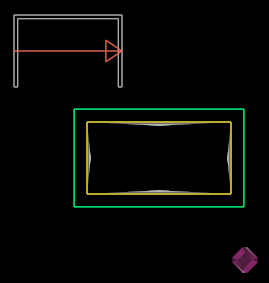
The arrow in the bottom right shows the current up direction and mirroring. You can change it with [, ], and p, but -- since all challenge levels are played in the standard orientation (arrow up, red on the right) -- you shouldn't.
Creating the Portal and Gem
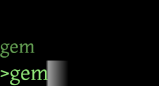
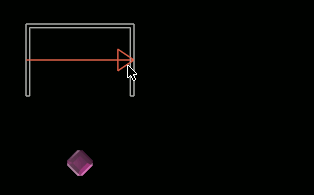
All challenge levels need a portal side to start at and one or more gems to collect. To create them we use the creation prompt. Press space to open the prompt (and then press backspace to delete the extraneous space that tends to appear the first time you do this). You are presented with a cursor and a list of options to type:

Let's create a portal side. Type si (followed by tab to autocomplete or the rest of "side" otherwise). Now press enter and a portal side should appear at your mouse cursor:

Repeat the process to create a gem -- space, type gem, press enter, and you have a gem at your mouse cursor:
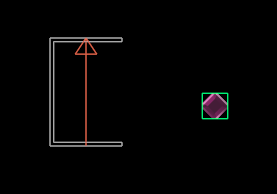
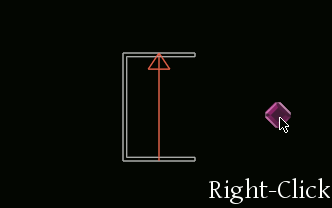
Okay! It isn't much of a level, but it's a start. You can select the gem or portal side by using the right mouse button. Moving the currently selected object is done by pressing g ("grab"), moving the mouse, and pressing the left mouse button to set the object down. (Right mouse button will cancel a movement operation.) You can also delete the currently selected object with x.
When the portal is selected, the left and right arrows can be used to rotate it. With a bit of grabbing and rotating, we can make an easy-to-win level:
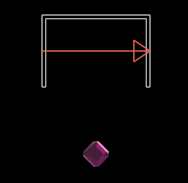
If you want to give it a try, select the portal (right click) and press enter. This will start at the selected portal:
When playing this way, escape will take you back to the editor.
Naming Things
If you get the gem when playing, you may notice some odd messages in the terminal:

Why does the style warning have no level name? Why is the path named so weirdly? It's because nothing in the level -- the portal, the gem, or the level itself -- has a correct name yet.
Saving: Naming the Level
Naming the level is straightforward. Press f1 to open up the save prompt, type a name for the level, and press enter:
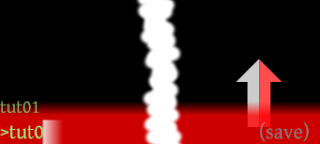
After pressing enter, a file called "tut00" (or whatever you named the level) should appear in both your ".rktcr/e_levels" and ".rktcr/levels" directories. The one in "e_levels" is the editable version, the one in "levels" is the playable version.
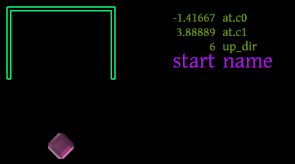
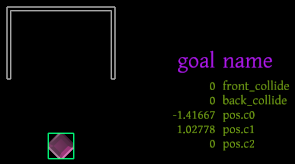
Edit Mode: Naming the Gem and Portal
To name the gem and the portal, you'll need to use edit mode. You access edit mode for an object by pressing tab while the object is selected. In edit mode, you see a list of values, navigate that list with the up and down arrows, and open up a prompt to edit a value by pressing enter. You leave edit mode by pressing escape.
For challenge levels, it is the convention to name the portal "start" and the gem "goal" (or "goal1", "goal2", and so on for multiple gems).
Now if you playtest the level (right click on the portal, press enter) and get the gem, the messages make more sense:

By the way if, you quit the editor (remember to save!) and start the game now, you'll see your level at the bottom of the challenge files in the "impossible" category. Category is determined by name; if you'd like your level to be in the "basic" category, start its name with "c-"; for "tricky" use "b-"; and for "impossible" use "a-".
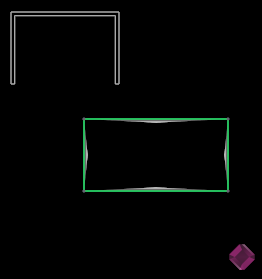
Creating Some Geometry
Note: if you happen to have left the editor and returned you can load your level again by pressing f4.
This level is perhaps a bit too straightforward, so let's modify it by adding a platform. Use the creation prompt to make a 'poly' object (i.e. space, poly, enter):
Of course, just having a platform sitting there isn't very interesting. To change the shape of the platform, use edit mode (tab to enter, tab to leave -- I know this is inconsistent, but I never got around to changing it).
Edit mode keys are reasonably similar to Blender. There are a fair few functions, so I'll just list them:
Editor Controls (Polygon Edit Mode)
- right click -- select nearest vertex. (Or toggle selection state of vert, if shift is held.)
- a -- select/deselect all vertices.
- g -- grab (translate) selected vertices.
- r -- rotate selected vertices. (Rotation angles quantized if shift is held.)
- s -- scale selected vertices.
- d -- subdivide edges between selected vertices.
- x -- delete selected vertices.
- e -- extrude selected vertices.
- f -- flip direction of curve (the long triangles on the edges should point to the inside; if they don't, use f).
Press 0 through 9 to add a grid. Press the same number again to remove it. The grid is used to quantize translations. Press ctrl to momentarily toggle. Press shift to snap to grid.


With a bit of editing, your boring platform can become something more interesting. Be sure to save and playtest often.
Wrapping Up
In this tutorial, I introduced Rktcr's editor; showed you how to create a very basic user level with a single portal, gem, and platform; demonstrated how to name the portal and gem so that path names would make sense; and talked about how to edit the platform to make the level more interesting.
In the process, I covered the following basic controls:
Editor Controls (not in Edit Mode)
- f4 -- load prompt; type name and press enter to load. Escape cancels.
- f1 -- save prompt; type name and press enter to save. Escape cancels.
- middle-click drag -- pan view (command-left-click drag works on OSX).
- mouse wheel -- zoom view (two-finger scroll gesture works on OSX).
- [, ], p -- adjust view rotation and mirroring (not very useful for challenge levels).
- space -- open create prompt; type and press enter to create object. Escape cancels.
- right-click -- select object.
- g -- grab object. Move mouse to translate; left-click to set down, right-click to cancel.
- tab -- edit mode.
- x -- delete selected object.
- left/right arrow -- rotate currently selected portal side.
Next Steps
These basic controls and ideas will serve you well in creating levels, but there is much more to explore. In upcoming tutorials, I will cover making your level's geometry smoother using subdivs, arc-gons, and paint; changing your level's physics by adding dynamic objects and constraints; working with disruptable platforms and gems; adding bursts; making your level prettier using style layers; and giving folks a par time using claims.
No comments:
Post a Comment