1. icon for News
  2. icon for TCHOW

News

Showing posts with label rktcr. Show all posts

Wednesday, April 1, 2015

The Rktcr Benchmark

In preparing Rktcr for release on Steam, I've been making some minor adjustments to the code and art (Steam Achievements! Blinking characters!). As I've made a bit of a fuss about before, Rktcr is a game that plays exactly the same across three compiler/OS combinations (g++/Debian, clang++/OSX, cl.exe/Windows). As such, part of any update is confirming determinism with an extensive test suite.

Specifically, I have the game compute SHA1 hashes of relevant state as it plays itself on a hand-crafted set of ~1,600 par time paths. Yes, there are over 1,600 individual paths segments you might want to play in Rktcr, and I have a plan to add cheat-proof leaderboards for all of those. But that's a topic for another post.

The Benchmark

So how do my Windows and Linux partitions stack up against each-other on this (blended filesystem/compiler optimization) benchmark? (I'm not testing clang++/OSX since that's not installed on the same machine.)

OSCompilerTime
WindowsVS2013, Update 3120 seconds
WindowsVS2013, Update 4121 seconds
WindowsVS2013, Update 4, optimizations off137 seconds
Linuxg++ 4.8.179 seconds
Linuxg++ 4.9.276 seconds

I'm pretty sure that the one-second difference between VS updates is within noise, though I dread that it may be a performance regression. Turning optimizations off demonstrates that they are at least doing something.

Under Linux, there is a noticeable improvement between the steam-runtime-targeting g++ 4.8 and my system-wide g++ 4.9; whether it's a compiler or standard library difference isn't clear; but it is certainly nice when newer compilers make old code faster.

Finally, I'm surprised that the Windows/VS version is doing so poorly compared to Debian/g++ -- my previous experience has been that cl.exe produces code that is a fair bit faster than either g++ or clang++. I'm left wondering if this particular code is something that cl.exe fails to optimize properly, or if the Windows stack is failing somewhere else (filesystem read performance? standard library implementation?). There could even be exotic hardware causes -- Windows and Linux are run from different [though identically-branded, purchased-at-the-same-time] SSDs -- perhaps one is slower.

Thursday, October 10, 2013

Rktcr Limited Edition (Video)

With just about 12 hours left in the Indie Game Stand sale for Rktcr, I decided to make the following video to give folks a better look at the Rktcr Limited Physical Edition, one of which has now been claimed by the highest contributor in the aforementioned sale.

So if you think this looks cool, start figuring out how to convince me to part with the other copy.

Friday, October 4, 2013

Rktcr's Limited Edition

From October 7th-10th, Rktcr was on pay-what-you-want sale at Indie Game Stand, with 10% of proceeds supporting the EFF. Paying more than average would have netted you an exclusive level pack and a custom digital wallpaper. But that's not what this post is about.

Paying the most would have gotten you one of the only two limited edition physical copies of the game. And these things are amazing. And that is what this post is about.

Each one is an obsessively-crafted testament to my deep love for Rktcr, and feature (from outside to inside):

A paper "Rktcr"-logo band, made from five interleaved sheets, hand-cut and painstakingly assembled.

A Rktcr sprite print box. Each of the four patterns used on these two boxes and their lids are unique and will never appear elsewhere.

A hand-made velvet/foam cushion to showcase...

...a USB drive filled with Rktcr v3.1 and covered in 23K gold leaf, ...

...with a silver-plated chain tassel.

These two limited edition copies are truly amazing things. They, in as non-creepy a sense as possible, reify my deep love for Rktcr, my desire to see it perfected, and my joy at finishing the game. The whole assemblage has a nice weight in the hand, and the drive and chain feel luxurious as you manipulate them.

Tuesday, October 1, 2013

Making Rktcr Levels: Bursts

I'm trying to spend most of my time as of late getting an iOS beta for Rainbow out, so this Rktcr tutorial will be a brief one.

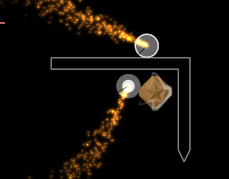
In this tutorial, I will show you how to make bursts -- those little exploding circles that can give the player's vehicle a shove in the right (or wrong) direction.

I will be assuming familiarity with the basics, but nothing more. (Well, other than a full version of Rktcr.)

Bursts

Bursts are actually just gems with the special name. So, to make one, first create a gem (space, gem, enter), then edit its properties (tab), and set the name to burst.

You can still use the front_collide and back_collide properties, like on gems, to change which wheel(s) will trigger the burst.

And that's it! A short tutorial, to be sure, but the upcoming one about style layers will be quite a bit longer. (And, after that, there's only claims and I'll have taught you all there is to know about Rktcr level editing.)

Tuesday, September 24, 2013

Making Rktcr Levels: Disruptable Platforms and Gems

In this Rktcr editing tutorial, I'll talk about how to create disruptable platforms and gems. These are platforms and gems that only one of the vehicle's wheels collide with. This tutorial assumes knowledge of the editor basics.

If you own the full version of Rktcr (and, really, you should), you can grab this level pack to follow along.

In this tutorial, we'll make a level where the player needs to navigate out of the a starting box by letting the front wheel fall through one segment and the back fall through another. After this, the player will need to pick up the final gem with the appropriate wheel (lest it be knocked into the abyss).

Disruptable Platforms

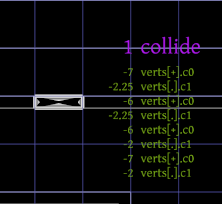
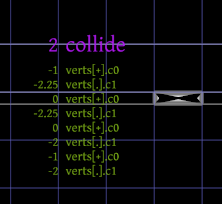
First, we'll make the two short segments in the bottom of the starting area disruptable by going into property edit mode (select, shift-tab), selecting collide (up/down, then enter), and changing the value to 1/2 for the left/right segment (delete, 1/2, enter).

The polygons will now be highlighted in white/gray, indicating that the front/back wheel (only) will collide with them.

Of course, it never hurts to actually check by playtesting the level (select start portal, then press enter).

Disruptable Gems

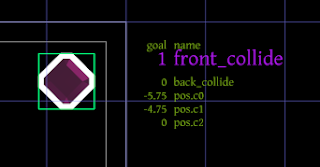
Making the gem collide (instead of be picked up by) the front wheel is a similar procedure. Select the gem, drop into edit mode (tab) and set the property front_collide to 1:

The gem will be surrounded with a white band to indicate that the front wheel collides with it.

As before, you can always confirm that things are working as you expect by playtesting.

Conclusion

In today's rather short tutorial, I showed you how to make disruptable platforms by setting the collide property on level geometry, and how to make disruptable gems by setting that front_collide and back_collide properties on gems. It is worth noting that -- though we did not do so in this tutorial -- you can also change the collide property on dynamics.

Disruptable platforms and gems can lead to situations where players need to carefully consider the vehicle's orientation. They can add challenge to maze-like levels and also allow for tricky momentum-conservation strategies (like letting the wheel that does not collide spin around the one that does).

Next Steps

I've covered nearly all of the features of the Rktcr editor. The only tutorial subjects that remain are bursts; style layers; and claims.

Tuesday, September 17, 2013

Making Rktcr Levels: Dynamics and Constraints

In this Rktcr level creation tutorial, I will describe how to add dynamic (i.e. physically-simulated) geometry to levels, and how to add constraints between these dynamic bodies. This tutorial builds on ideas introduced in the basics and geometry tutorials.

And, as before, you'll need the latest full version of Rktcr (v3.1 as of this writing).

In this tutorial, I'll start with some existing static geometry, and make some of it dynamic. Above, you can see the plan I'll be following.

If you'd like to follow along, you can download a zip file containing this level (along with the finished version) here. Place the files in your ".rktcr/e_levels" folder, start Rktcr in edit mode, and load tut-dynamics with f4.

Making Dynamics

In Rktcr, all dynamic bodies are created from static geometry, much in the same way smoothed polygons are created from regular polygons.

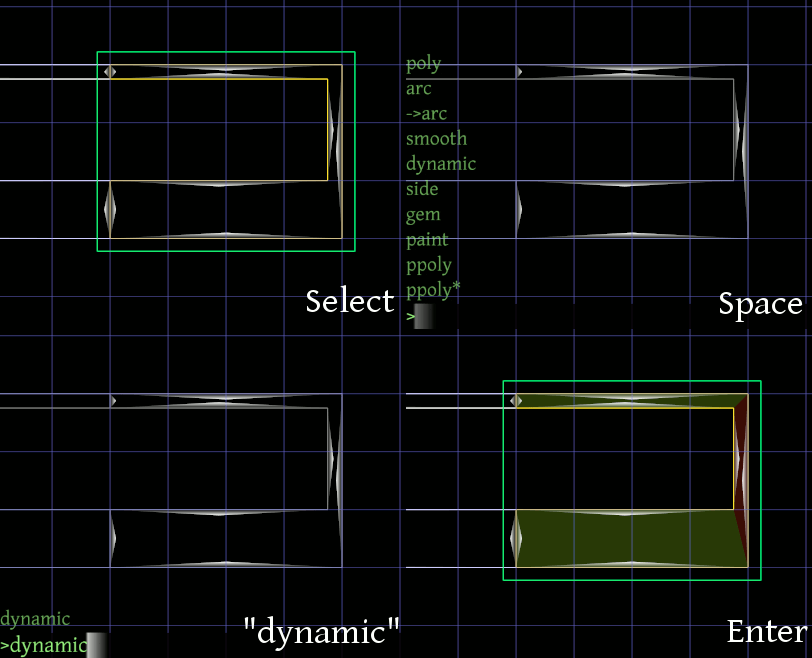
Select the static geometry you'd like to make dynamic with right-click, press space to open the creation prompt, type dynamic (or dtab, if you're feeling lazy), and press enter.

You can make a dynamic body static again by selecting it (right click) and pressing x. (This deletes the "dynamic" modifier.)

Dynamics Parameters

Dynamics have two types of edit mode: geometry (tab), and parameter (shift-tab). Geometry edit mode does what you'd expect -- edits the geometry underlying the dynamic. Parameter edit mode allows you to change some physical (and physics-effecting) parameters:

  • source_tag shouldn't be changed.
  • seed is the seed for the (somewhat randomized) convex decomposition algorithm. If you don't like how the dynamic is being split into red and green regions, change this.
  • gravity is the direction of gravity effecting the block (0-7 are fixed, 8 is "down relative to the current view").
  • density is what it sounds like. If the object seems too heavy, use something lower.
  • moment_factor scales the moment of inertia. Increasing/decreasing will make the object spin less/more easily.
  • rel_pos is a starting offset for the object as (x,y,theta). It don't recommend using it.

Warning

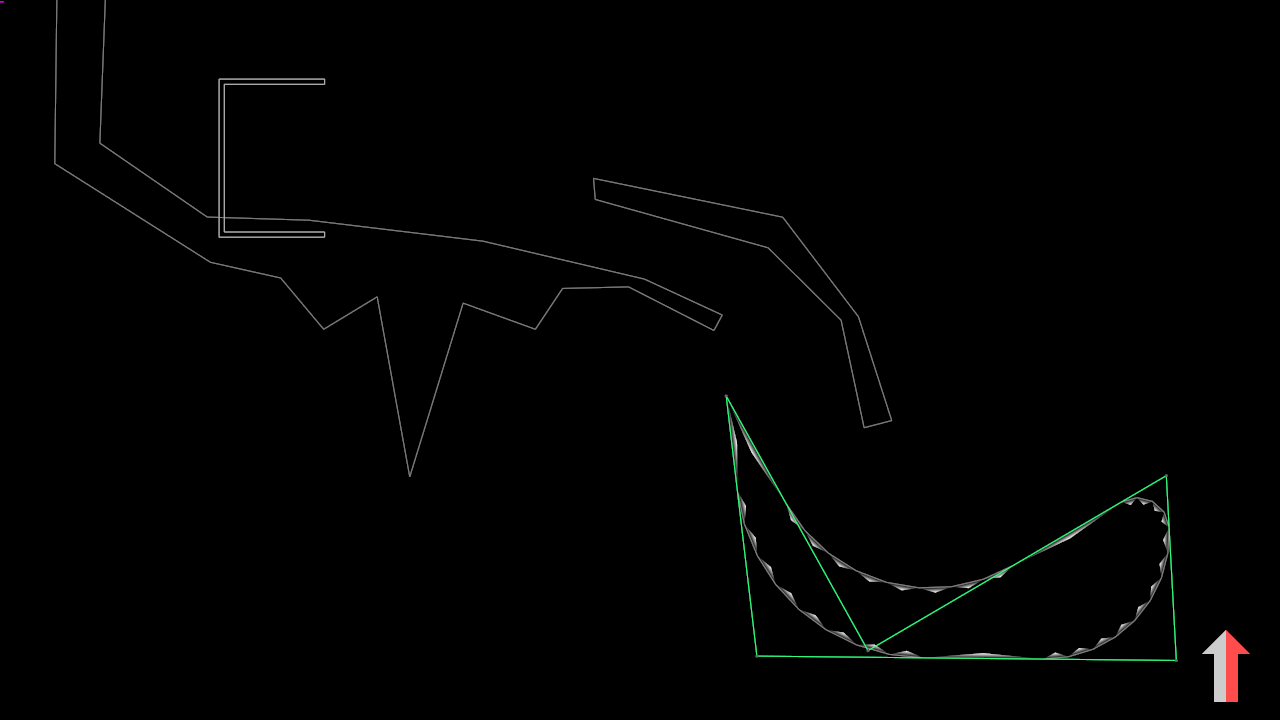
When working when dynamics, save often! Sometimes, the convex decomposition produced by Rktcr's code can contain degenerate polygons, which -- in turn -- will make Box2D (which Rktcr uses for simulation) assert() when you attempt to test a level.

There will be a fix for this in the next version of Rktcr. Until then, save before you test. (The -- admittedly cumbersome -- work-around is to change the seed value used on the problematic dynamic until you find one where the editor doesn't exit upon running the level.)

Testing

This is what the level looks like after creating all the required dynamics:

At this point -- be sure to save! -- you can press enter to go into physics test mode. (If you end up in play test mode, it's because a portal side was selected.) In physics test mode time runs inexorably forward, and you can grab and pull on objects using the mouse.

Physics test mode will be useful as we create our various constraints.

Constraints

Plain dynamics bodies are fine for creating stacks and tippy platforms, but for the sort of stunts we have planned for this level, we need some physics constraints. Physics constraints are created in the Rktcr editor by pressing c. This creates a constraint between the current dynamic selected and either the previous two dynamic selected or (if the previous selection wasn't a different dynamic) the world.

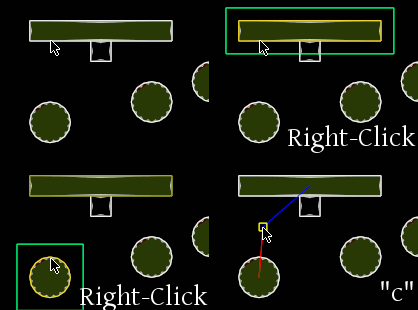
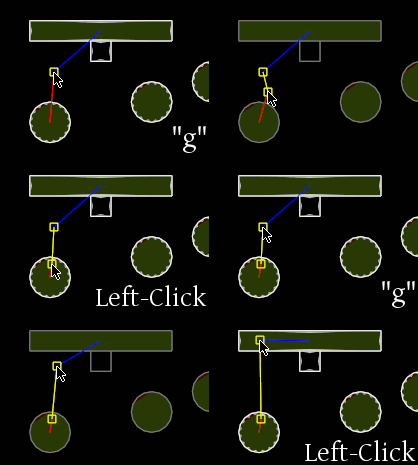
Another way to say that is: to constrain two dynamics to each-other, right click on them in turn and then press c; to constrain a dynamic to the world, right click on it twice and press c:

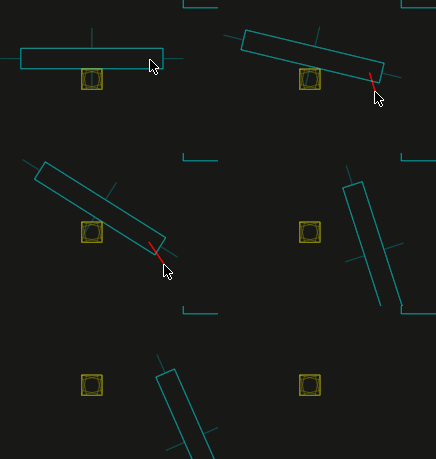
Once a constraint has been created, its endpoints may be moved by pressing g while the constraint is selected:

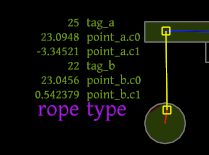
Pressing tab while a constraint is selected allows you to edit its type:

For the hanging circles in the level, we want the constraint type rope, which prevents the constraint points from getting further apart (but does allow them to get closer).

Adding Ropes

Let's finish up the rope constraints. Keep in mind that x can be used to delete constraints, and make sure to set the constraint type to rope (using edit mode -- tab). Also, I find that using the size-1 grid (1) and holding shift (snap to grid), helps to keep things aligned when moving constraint endpoints.

Note that the red/blue color of the lines connecting a constraint to its adjacent dynamics depends on the order in which they were selected, and isn't important to the actual simulation (so if yours don't match mine, don't worry).

At this point (and after saving), you can drop into test mode with enter and make sure everything moves how you want it to (e.g. try dragging the circles with your mouse to get a feel for the rope constraint).

Other Constraints

The first stunt in the level uses rod constraints. Create these as before, but make sure there is no previously selected dynamic by right-clicking on the c-shaped piece twice before pressing c. If you do this properly, one end of the constraint (the one connected to the world) will show as an x instead of a box. Also, make sure to set their type to rod in edit mode (tab).

I slightly offset the bottom sides of the rod constraints because if I let them start vertical the c-shape would fall before the vehicle entered it. (This is one reason test mode is super-useful when working with dynamics.)

Finally, connect the ramp to the background with a pin constraint, so it will pivot up as the vehicle drives under it and then fall back into place. (Note that pin constraints are actually placed at the average of the two endpoints.)

The constraint's type should be pin by default, but it doesn't hurt to hit tab and check.

Finishing Up

All the constraints are now in place:

Generally, it's good to playtest levels as you go along, but I elided that for the sake of this tutorial. So, the question becomes: is this a winnable level?

Well, the last part is quite tricky (removing the circles might be a good idea), but, yeah, it is possible.

Next Steps

Dynamics are one way to add excitement (and chaos) to a level, but certainly not the only way. In upcoming tutorials, I'll talk about other methods, including working with disruptable platforms and gems; and adding bursts. I'll also go into making your level prettier using style layers; and giving folks a par time using claims.

Monday, September 9, 2013

Making Rktcr Levels: Geometry Types

In this Rktcr level editing tutorial, I will talk about the different kinds of level geometry available to you in the editor. I will assume familiarity with the basics of Rktcr level editing.

As before, Rktcr full version 3.1 or newer is required. (While version 3.0 technically includes the editor, it fails to include a font used thereby.)

You can grab the level pack for this tutorial here. The 'tut-geom' file is the starting point and the 'tut-geom-finished' is the finished level. To make us of them, place the files in your ".rktcr/e_levels" folder, and load into the editor using f4.

Getting Started

To start this tutorial, create and name a portal side ("start") and gem ("goal"), and save (f1) this as a new file. I placed the portal and gem far apart because I anticipate adding lots of platform geometry, but you can always place them wherever and adjust it later. (You could also use the starting point from the level pack, but it's probably quicker just to create it yourself.)

Types of Geometry

When you open the create prompt -- space, then backspace to delete that pesky space that appears the first time you open it for some reason -- you'll notice quite a few options:

We will be using all of the geometry-related options in this tutorial. A brief overview:

Create Menu Options

  • poly -- create basic straight-line polygons. Workhorse geometry, covered in the basics. Reviewed below.
  • arc/[->arc] -- create/[turn selected polygon into] arc-gon -- a polygon where each corner is replaced by a circular arc. Covered below.
  • smooth -- create a subdiv-smoothed version the currently selected polyon. Covered below.
  • dynamic -- create a dynamic (rigid body) version the currently selected polyon. Will be covered in a later tutorial.
  • side -- create a portal side. See the basics.
  • gem -- create a portal side. See the basics.
  • paint, ppoly, ppoly* -- functions relating to level-set-painting geometry. Covered below.

Polygons

First, let's create some polygons; they are a good fundamental starting point, after all. Additionally, the polygon editing controls remain useful for arcgons and smooths.

The controls for polygon creation are explained in detail in the basics, but to briefly review: tab to toggle edit mode; right-click to select, shift right-click to multi-select; grab, scale, and rotate to move verts; extrude and divide to create more verts; x to remove verts.

Arc-Gons

Now let's add some arc-gons to the level. Create an arc-gon using the prompt and drop into edit mode (Space, arc, enter, tab).

All the polygon editing controls still work, but now apply to the "cage" around the actual arc-gon. Additionally, left-click dragging will edit the radius associated with the selected corners.

When two adjacent corners's radii are longer than their edge, their radii are clamped. You can use this to precisely control the radius of a corner by placing a zero-length vertex some (fixed amount) of grid units away:

For example, in the above picture, the marked verts constrain the bottom left and upper right corners to have radii no greater than one grid unit and two grid units, respectively.

Converting Polygons to Arc-gons

One can also create arc-gons from polygons using the ->arc create command. This will convert the current polygon into an arc-gon with zero-radius corners.

Here, I've used ->arc on a duplicate of the left ceiling polygon, then smoothed the internal vertices by going into edit mode, selecting them, and left-click dragging.

Really, you could just always work with arc-gons, but sometimes you don't want to worry about accidental left-click drags introducing small-radius corners.

Smoothed Polygons

Another way of creating polygons with smooth corners is to use the subdivision modifier. These look "gooier" and a bit more organic to me than arc-gons.

Above -- from left to right -- I've created a poly and modified it a bit; then selected it and applied smooth (space, smooth, enter); and, finally, dropped into edit mode (tab) to adjust the vertices more.

Note that duplicating a smoothed poly will give you a copy of the underlying cage, not the smoothed version, and pressing x on a smoothed poly will delete just the smoothing.

Level-Set Painting

Our level is coming along nicely. Let's finish it off by creating some geometry with level set painting. Painting is a free-form method of specifying geometry; you draw values into a grid, then extract contours of this potential field for use as level geometry.

To start, we'll need a canvas to paint on. Create one by typing paint at the create prompt (i.e. space, paint, enter). This will immediately drop into painting mode.

In painting mode, you add material with left-click and remove it with right-click. Red lines show the level geometry that (may) be created from the current paint. The yellow line shows the outline of the canvas. This will be automatically resized if you paint outside its borders.

The brush has two parameters, a radius (modify with shift-mousewheel) and a falloff distance (modify with ctrl-mousewheel). The above image shows a few options. The falloff doesn't really do much unless you start painting a lot of positive and negative strokes, in which case it changes (a bit) how the generated geometry moves.

If you are painting large areas, the editor can bog down. In this case, you can use up arrow and down arrow keys to adjust the painting grid resolution. This is non-destructive (you can always switch back to an old resolution without a problem).

Note also that some simplification is always run on the output level geometry, so using finer grids may not actually change the number of vertices in your level.

Adding Paint-Polygons

If you have been playtesting your level, you will have noticed that your awesome paint doesn't actually appear in the game yet. This is because you need to create paint polygons to pull information out of the paint.

The ppoly* command (i.e. space, ppoly*, enter) creates paint polygons for all contours in the currently selected canvas, while poly creates a polygon based on a seed point at your current mouse cursor.

Once created, paint polygons can be grabbed to offset them from their canvas positions, or deleted with x (useful for removing shards). Additionally, changes in the original canvas will be reflected in the extracted outlines. This can be useful for minor edits to platform shapes.

Note that sometimes -- due to, e.g., topological changes in the canvas -- one can end up with multiple ppoly's for the same contour. This results in overlapping geometry and is generally bad news for your levels.

Wrapping up

In this tutorial, I showed you how to use Rktcr's four different types of level geometry: basic polygons, the somewhat smoother arc-gons, the organic looking smooth modifier, and the freeform paint-based geometry.

I find that each type of geometry lends itself to a different style of level -- as you'll notice in the game -- but that it can occasionally be useful to mix them up for specific situations.

Next Steps

Now that you are familiar with the various ways to create level geometry, it's time to add details and graphical polish. In upcoming tutorials, I'll talk about adding dynamic objects and constraints; working with disruptable platforms and gems; adding bursts; making your level prettier using style layers; and giving folks a par time using claims.